Super excited to finally get an oat flaker–the KoMo FlicFloc. Thanks to the wife who got me a great father’s day gift. So far, it makes for some great oatmeal. Definitely a different (more oatey, go figure) taste than commercial oat flakes. My daughter eats oatmeal for breakfast a couple days a week, so I was relieved when she seemed to take to the new flavor without any fuss. It really only adds less than 1 minute to the preparation process and is totally worth it.
baby eating oatmeal by hand, while holding a spoon
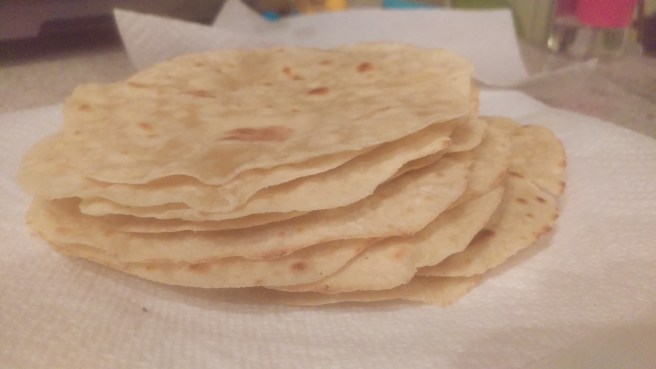
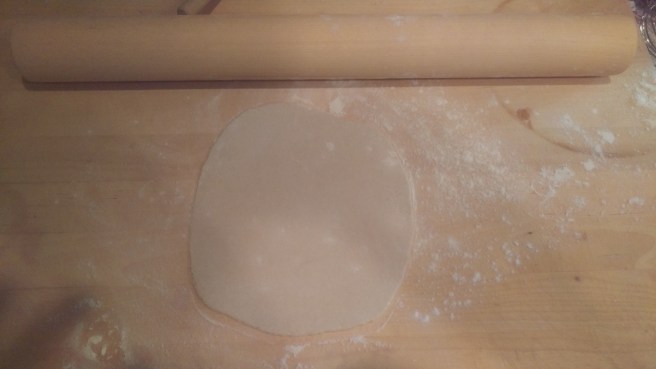
My last flour tortillas were fine, but not great. I finally got around to making another batch with the remaining hard white Sonoran wheat berries from Hayden Mills. The end result were light and sweet tortillas, with good chewiness. I did manage to overcook a couple, which makes them too brittle when the time comes to eat. Overall, I feel like I am starting to get a feel for a respectable tortilla. Next time I want to go big and make a classic machaca burrito. I might need a bigger working space.
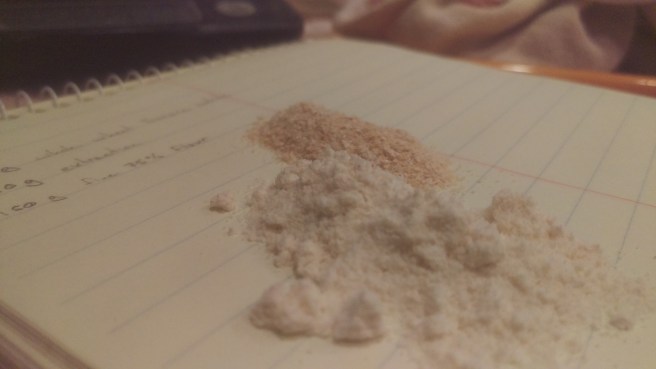
The flour milling was a basic fine grind, that was sifted through the general #50 mesh sieve. The result was a 75% extraction bolted flour.
flour v. bran100% whole hard white Sonoran wheat
For the dough, instead of using all lard, I used about half lard and half sunflower oil. I also lowered the total fat content slightly below 25% to try to get a more pliable, chewy tortilla. My wife prefers them this way, over the thicker, flakier style.
Final ratios for the dough:
150 grams of 75% hard white Sonoran wheat
19 grams lard
16 grams sunflower oil (total fat was 23%)
1/4 tps salt
75 grams luke warm water (50% hydration)
For rolling out the tortillas, I picked up a new short 8″ rolling pin. It really helps keep the process of rolling out a bunch of small taco size tortillas. A big rolling pin gets getting in the way and you have to clear a lot more space around your work station (which is hard in a small kitchen). The dough was much more pliable and less prone to breaking on the edges or sticking to the cutting board.
My wife said they were my best tacos to-date. I think that is saying something, as I have made some decent ones in the past (last time not included). No pictures of the final meal, but it was slow roasted pork shoulder that had been rubbed in a southwest style spice blend of my own creation, pulled apart and served with a simple ancho chile sauce, avocado salsa, and a little sour cream. I used to keep a rotation of home-made crema, which is delicious, but a lot of work to always have around when you need it on short notice. I am a poor planner.
Frying the tortillas is part of process that I wish I had down a little better, or at least wish I could do a couple at a time. These tortillas bubbled up nicely and, aside from overcooking about a third of them, them ended up my best yet.
Please excuse some of the poor photos, the glass over my camera phone is slowly breaking and making it hard to get clear images.
Last year I stumbled on a video of chef Mutsuko Soma making soba noodles in the traditional Japanese manner. I found it fascinating and, despite not being able to try her restaurant Miyabi 45th yet, I had no doubt that they were delicious. It was time to learn a new noodle (beyond pasta). I figured the best way to learn would be watch a bunch of videos of soba noodles masters on YouTube. They are surprising fun to watch, if you love noodles. Check out here and here.
It took a while to get around to it, but finally the time came to make soba noodles and then got delayed and then delayed another week. I even had the milled buckwheat flour ready to go (see last post) and sitting in the fridge, just no time to cook.
Then one night, as I was in the process of making tortillas and had a pork shoulder roasting and ancho chiles steeping for a sauce, I thought I better just mix up that buckwheat flour and see what happens. As best as I could recall from those video, I mixed up the flour with some warm water, tossed it to evenly hydrate the flour and then formed a smooth workable clay. I failed to measure anything as I went (I generally go strictly by feel when making pasta as well).
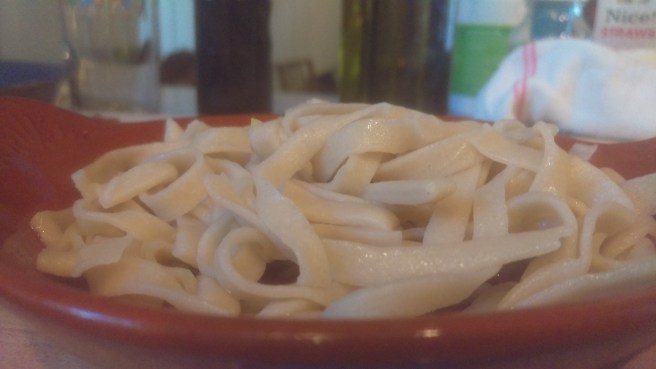
Unlike the soba noodles masters in the videos, I wasn’t able to roll out the dough to an even square shape. I was able to get close enough to not lose too much in uneven edges after folding the dough for cutting. For the folding, I milled and sifted a little extra buckwheat flour for dusting as I went and between the layers. I may have rolled it a little too thin, however, as the folds resulted in creases. The dough was surprising resilient though and had a great feel, like a moldable paste or clay.
I was a little worried that the noodles wouldn’t hold up to the boiling water, but they came out beautiful and firm. The noodles were soft, with a nice bite and flavor that really tasted of buckwheat. For my first try at 100% buckwheat noodles, I think I kind of pulled it off. Fully aware of course that my efforts to re-create these noodles will more than likely not be so fortunate. Since I made these without any real plan and not as our actual dinner, I had no ready accompaniments to the noodles. I ended up adding a dash of shoyu and a tiny drop of sesame oil.
There weren’t a lot of noodles, but enough for a baby and a couple for my wife and I to try. Baby enjoyed playing with the noodles as much as eating them. Since she also loves chopped meat, I added some chopped up roast pork to the noodles. It wasn’t a great combination, so it is good that her palate is still not too discerning.
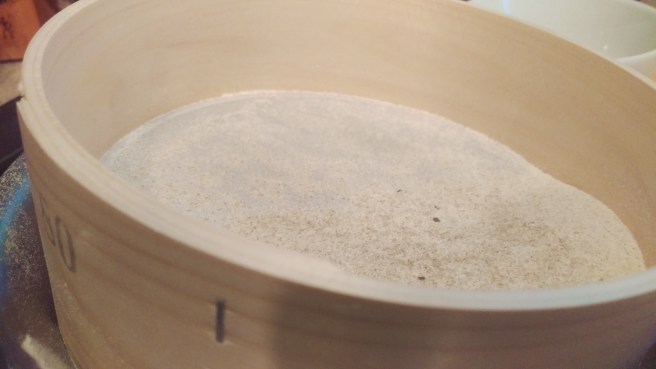
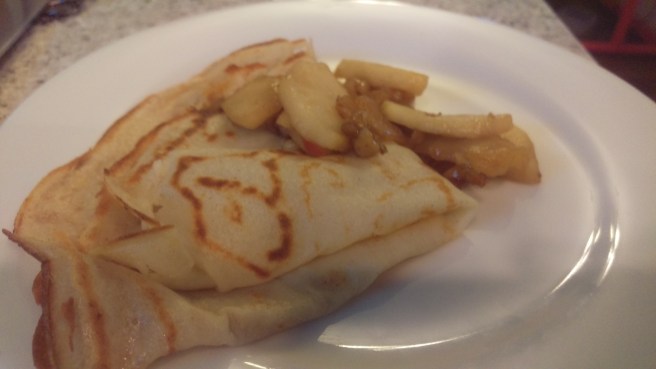
My mother and niece came over from Spokane to visit for the weekend and I decided it would be a good time to try out my newest, straight from Japan, flour sifter. I thought about giving soba noodles a try, but I opted for buckwheat crepes instead. My niece said she loves crepes.
First, the milling. I set the mill to a fine setting that I generally use for fine white flour. Fresh milled buckwheat smells wonderful. That pungent nutty and bitter flavor really carried.
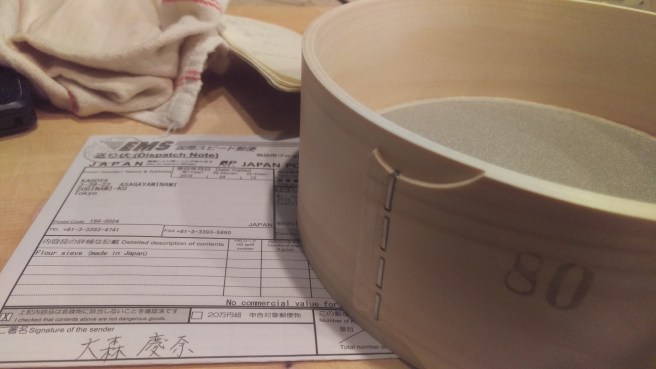
From the raw milled flour, I first sifted through my new #80 mesh traditional Japanese sieve. You can see in the notes below that it resulted in a roughly 57% extraction. This very fine buckwheat flour is what will ultimately be used to make soba noodles–next time.
The buckwheat middlings, the result of a being run through a #50 mesh sieve (leaving the bran behind):
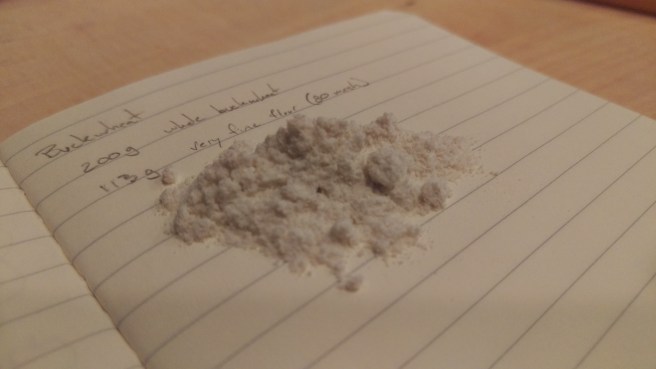
For the crepes, I added some of the middlings back to the fine flour, however, not enough in the end as they need more rustic texture and flavor. The crepe batter was:
65 grams very fine buckwheat flour (plus 10-15 grams of the middlings)
65 grams all-purpose flour
2 eggs
3/4 cups kefir (substitute for whole milk, cut with the water)
3/4 cups water
2 tbls melted butter
1 tbls sugar
1/2 tps salt
By design, the batter sat in the fridge overnight to be ready first thing Sunday morning.
This slideshow requires JavaScript.
My first couple of crepes out of the pan were a little bit of a mess, but as I got the temperature regulated and steady, they started to come out pretty decent. Because of the 50/50 buckwheat/all-purpose flour blend and using a very fine of a buckwheat flour, the crepes were much too refined. I was disappointed in how muted the distinctive buckwheat flavor ended up being. It was there, but generally could have been overlooked. They were fine for regular crepes though, with just a slight bitter hint of “wait is that buckwheat.”
The topping is a light (very little added sugar) apple and walnut compote.
Meet the new edition to my growing flour sifter collection. So far I have only used it once for its intended purpose–buckwheat. That tale of mediocre buckwheat crepes is for another post (coming soon). The short story is that I want to learn how to make proper soba noodles. I figured the best way was to get a traditional Japanese flour sieve. Somewhat surprisingly, I could not find one online in the U.S., so this was shipped from Japan.
Once I get a few attempts at soba with my own fresh milled buckwheat flour under my belt, I will have to order some from Anson Mills Ni-Hachi Sobakoh to compare. As with other flours, Anson Mills seems to be regarded as the best U.S. source of buckwheat flour for soba noodles.
My attempts to make a better emmer pasta continued last Sunday with a new approach to milling the emmer berries. I wanted to make a semolina using nearly the whole grain, removing only as much of the bran as possible. Through my various attempts, I found that removing just the bran or even getting anything close to a clean separation is very difficult. Regardless, I did end up with a nearly 100% whole grain emmer semolina flour that made an excellent ravioli.
The milling process was to grind the berries on a medium setting (close to mid-way between the fine and course on the Komo mill). This resulted in a good mix of fairly course meal and some finer semolina and flour. I sifted off the first gring using my basic mesh sifter (no specific # grade, but considerable larger mesh than my #50). I then tried to remove some of the bran using a standard kitchen strainer and through manual separation via shaking in a bowl and letting the lighter flakier bran float to the top. This worked somewhat (it works better with hard red wheat and spelt). I then ran the course grind portion through the mill again at a course-fine setting. I again sifted off the biggest flakes of bran.
In the end, I was left with a somewhat uniform fine emmer semolina. I did leave in the flour portion with the semolina. I started to sift out some of the fine flour, but realized it would be necessary for the ravioli dough. I also blended in some medium fine hard red wheat flour, again to add more pliability to the dough.
Final pasta recipe: 157 grams emmer semolina, 68 grams hard red flour (225 total grams of flour), 2 large eggs, and a teaspoon of extra virgin olive oil.
mixing flour and eggs
dough ball ready to rest
wife filling the ravioli
The final product: Without a pasta roller, it is hard to get the dough thin enough consistently across the length of the rolled dough.I should have given the dough just a couple more final rolls, as the edges where the pasta is double-thick was tad too much. Even with that, these were the best ravioli I have made to-date. That is not saying much though, considering some disasters I have had in the past. The emmer pasta itself was wheaty with a good solid bite and nutty flavor tone (a very emmer flavor). Unfortunately, this didn’t match well with the spinach in the filling though and I would stick to hearty flavors next time to pair with the strength of the emmer semolina
Overall, I think emmer can make a decent pasta, but it takes some effort to get it right and probably not useful for a go-to everyday style pasta. I still really need to get my hands on some durum wheat.
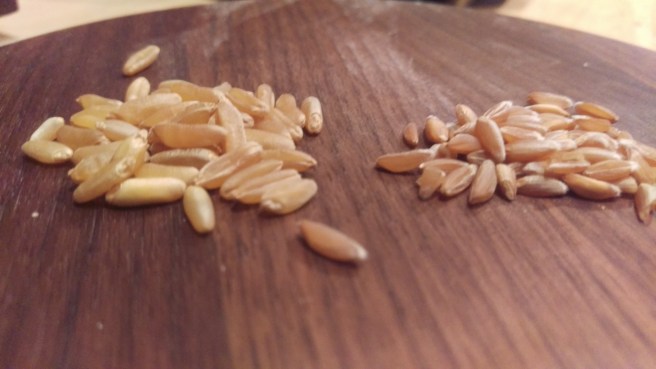
After reading more of Cooking by Hand, I wanted to break from my usual egg pasta and make a semolina based pasta with just flour and water. Time to focus on the most basic pasta, relying only on good flour. Instead of durum wheat (which I don’t have any of), I used closely related emmer and Kamut. Both belong to the Triticum Turgidum species, as opposed to T.Aestivum for general wheat. Durum is the standard-bearer of this older branch of the wheat genus, which originally comes from emmer as its more ancient ancestor. Pictured below you can see the differences between Kamut (left) and emmer (right).
I first milled the Kamut and emmer on the course edge of a fine grind, which I thought would allow me to sift off the bran to produce a medium fine semolina. However, too much was trapped by the 50 mesh sifter. I took the mill down a couple clicks to medium fine. However, passing this flour through the 50 mesh sifter still resulted in a scant 55% extraction, leaving too much of the milled grain behind. Not really sure of what to do, I decided to use only the sifted flour portion to make the pasta. In the end it was’t really semolina, more of a emmer and Kamut flour blend.
whole emmer
emmer flour
After some reading, I think I have a approach that may work to get semolina. I will give it a try next time. Although I think I will try to find some good durum berries.
On to the pasta. First, I blended the sifted emmer flour (180grams) with sifted Kamut flour (60grams) and added only water (~120grams-50% hydration).
With a couple minutes of kneading , the dough came together nicely with a firm texture and spring-back. It may have been just a tad on the too wet side though. More flour was needed to roll it out than normal. (Disclosure: I used King Arthur all-purpose for rolling out flour.) After hand-rolling the dough into long flat sheets, I cut it into flat 1/4 inch ribbons to get what was essentially an egg-less tagliatelle.
pasta dough ball
cutting
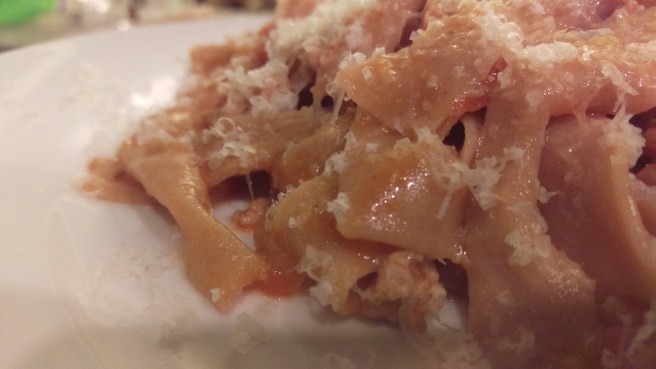
The sauce and final product: I browned some ground pork and set it aside. Sauteed finely diced white onion and garlic, added one can of hand crushed (by me) San Marzano tomatos, followed by the tomato juice from the can, some dry herbs, a splash of the red wine I was drinking, and then fresh oregano at the end. Grated parmigiano-reggiano on top.
You can see in the picture that the noodles did not quite hold up. The dough just wasn’t tough enough (combined with leaving them in the boiling water for a tad too long).Still, the pasta was light and fresh, with a mild wheat taste. Distinct from the dry-earth flavor of durum semolina pasta. The quality it evoked was simplicity–that this is a pasta noodle, one that can comfortably hold its own (despite being a little soft) with nothing but a simple tomato sauce.
baby loves pasta (smart baby)
The baby loved the leftover pasta the next night. She will hopefully learn to appreciate al dente, but right now mushy is good. (It is hard to get a good picture of a baby eating.) The wife and I re-purposed the sauce for a quick rigatoni using store bought dry noodles. She said my pasta was better.
So, there is a device called a farinograph that is used to test certain qualities of flour, specifically its gluten/toughness qualities. This device mixes flour and water and measures how hard it is to mix the dough–i.e. how much resistance the dough gives to the mechanical mixer blade. The results are given in Brabender units. The reason? Probably simplest to let Brabender explain:
The determination of the flour quality and its processing characteristics are a basic demand in the milling and baking industries for ensuring optimum and uniform flour qualities for the manifold baking and noodle products.
Surely there is a place for scientific testing of flour, but there is something that seems absurd in the over-technicalization of basic food production. The scheme makes more sense when placed in the context of mass production of breads with industrial scale bakers acting more as executive technocrats looking at charts to ensure the end result is always the same. Uniformity and alienation of the product from its source is essential to create commodified foods.
Regardless, knowing more about the science part of my flour is still worthwhile so I thought I would try my hand at some makeshift testing. I decided on a simple gluten ball wash test. I first mixed up a small amount of superfine Red Fife flour with 50% water hydration and kneaded the dough thoroughly to a smooth round dough ball, which I then let rest for a bit (I didn’t keep track of the time–bad science).
mixing
dough ball
After rinsing out the starch (mostly) from the dough ball. I then dried the stretchy protein ball to get its approximate weight. At these weights, the scale is not precise enough to give any meaningful numbers, but the protein content was over 10%. The gluten was surprising tough and a little like an over-chewed piece of gum. It baked into a hard puff ball. I could definitely see anti-gluten folks using this as a demonstration of how horrible gluten is, it surely doesn’t look appealing separated out from the starch. The taste of the baked gluten was bland, but with a little sweetness, like a bad pastry. Weird stuff.
My wife, who hates chewing gum with an unreasonable passion, almost refused to even take this picture.
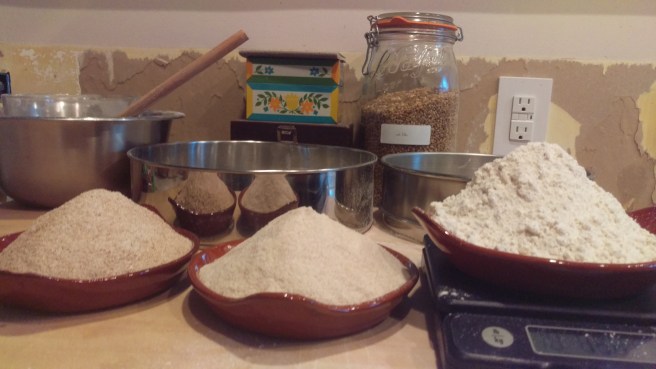
The next batch of grain up for milling–Red Fife (ordered through Breadtopia). Grown primarily in Canada, this is a classic heritage grain that is making a real comeback in artisan bakeries. For pretty good reason. This Red Fife resulted in some tasty breads.
First the milling. Picture below is the end result of 500 grams of Red Fife wheat berries. On on the left is mostly bran that was extracted with the #50 mesh sifter, in the middle is fine bran and germ extracted with the #120 mesh sifter, and on the right is the superfine Red Fife “bolted” white flour. The final breakdown was: 130g heavy bran, 220g fine bran and germ (middlings?), and 140g white flour. About 10 grams of loss/imprecise weighing.
I realize that I may have gone too far with the #120 mesh sifter. The end result of a 28% extraction “bolted” superfine flour takes a ton of work. It may simply not be worth it in the end, except for very special cake or OO flours. I might have to try a #100 or #80 mesh to make life a little easier on myself and produce a bolted white flour that is fine enough for everyday uses. I just need name for this grade (hella fine?)
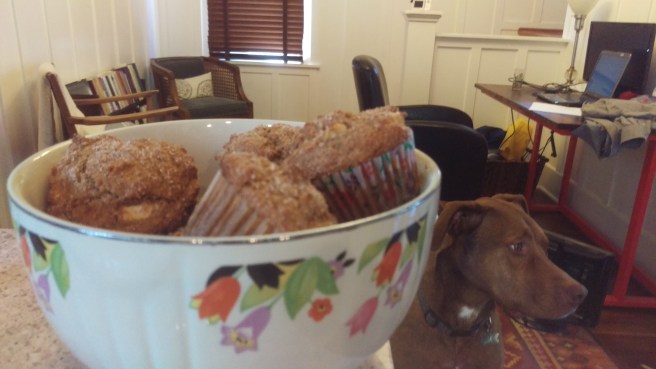
This separated flour was destined for two things today, bran muffins and biscuits. The middlings are in a jar in the fridge. I have no idea what to do with it yet.
Bran muffins:
Lorenzo waits patiently for a snack
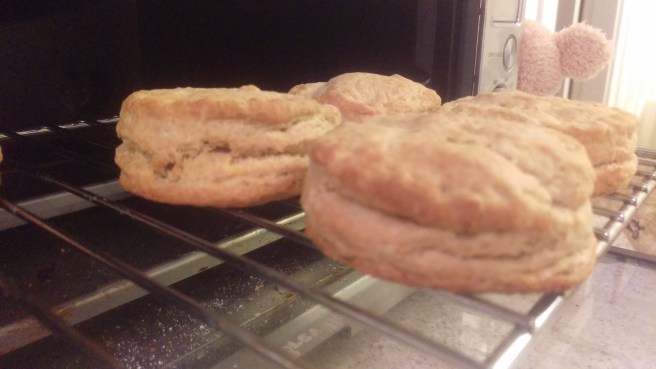
The biscuits:
I only noticed the baby toy after taking the photo
The biscuits were:
130g Red Fife “bolted” superfine white flour
5 grams baking power/1-2 grams baking soda
45 grams butter
95 grams kefir (a decent substitute for buttermilk)
Baked at 400 degrees for 17 mins. (Not in the toaster over pictured above).
mixing the butter into the flour
These biscuits were well, delicious. Interestingly, they were richer and wheatier than the nearly exact same biscuit made a couple days ago with the Turkey Red superfine flour. It was clearly the flour that made the difference. These biscuits still looked and tasted like whole wheat, whereas the Turkey Red was much closer to regular white flour. Both were good, but I preferred the taste of the wheat that came through with the Red Fife biscuits.
The final dinner was salmon, biscuits and pepper-herb gravy with sauteed scallions. I think my food staging/photography skills need a little work. My wife took this one, which was better than my not so great pictures, but still doesn’t do the meal justice.
My wife is from the great plains, not far from the Mississippi. A place I had only driven through a couple times before we started dating, without gaining much of an appreciation for the topography. Even in a car moving at unnatural speeds, the land seems too flat for too long and somewhat unreal. This land, stripped of the native grasses, now produces grain, corn and wheat, and people that reflect quietly.
Turkey Red is one of those grains that tells the story of wheat in the U.S. Introduced by immigrants to the great plains, gaining popularity due to changes in culture and technology (roller mills), and then ultimately being replaced by modern genetic hybrids and the new scientific clone wheat varieties. Whether Turkey Red makes a comeback, like White Sonoran, in the latest chapter of this story is yet to be seen. It may suffer from a name that makes people think of awkward birds, rather than the ancient land now known as Turkey (not a coincidence).The name of the wheat itself is a lesson in etymology and the constant shifting and movement of peoples across lands that change name, to later have no clear connection to the past.
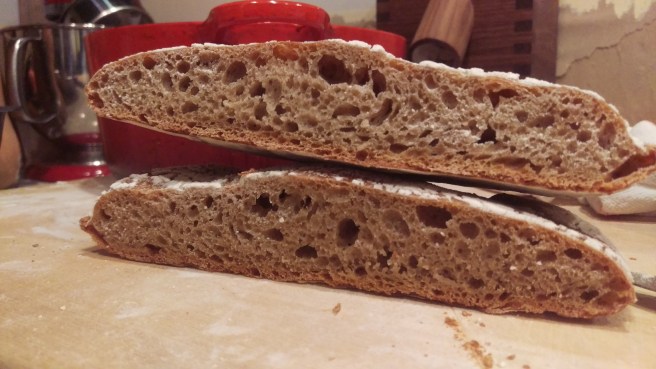
Back to the flour: Test #1 with the Turkey Red was a simple rustic loaf. In typical fashion, I messed up the timing of the rising and proofing, so the final product was not amazing. It was good though. The flour and resulting bread is strong, but I didn’t notice any great distinguishing characteristics on this first go around.
See my earlier video on milling the Turkey Red. Pictured below is the end result after sifting with my fine mesh sifter (#50, not the super fine mesh #120). There is a lot of fairly fine bran. Even after sifting, the flour felt mealy and heavy–not necessarily bad qualities for a good loaf of bread.
The dough was moderate hydration and left to rise and proof overnight (two nights total):
200 grams Turkey Red sifted flour (total flour 250g)
140 grams water (total water 190g) — 76% hydration
3 grams dry yeast
5 grams salt
Autolyse for 30 mins, mixed in salt (using the pincher method), left to rise overnight with periodic folding (3 times). Removed from fridge the following day and shaped into a round. I then ran out of time to bake and put the shaped dough back in the fridge to proof overnight. Not ideal and probably the primary error.
The dough was easy to work, smooth and developed a good firm tension. Notably, it rose more overnight in the fridge (the first night) than I would have expected. Good enzymes.
When I did finally get around to baking: 475 degrees for 25 mins covered in a dutch oven, and 20 mins uncovered. The bread didn’t rise much. Overproofed with dying yeast? Underdeveloped gluten structure? Probably a little of both. The crumb was nice though, nice random open pockets with a great chewy texture. At a 78% extraction, the bread was very whole wheaty. This is what inspired me to get the super fine mesh sifter.
(As an aside, I did make one quick biscuit from the first test batch of super fine Turkey Red–it was damn good. My wife said “why did you only make one.” Because . . . umm . . . well, I guess that was kind of dumb.)
The next test is to take the Turkey Red and make dinner rolls. Seems like that is a very great plains classic.
my new food tester
My daughter really seemed to enjoy the bread (with some prune jam to sweeten it up). She knows what she likes now, if she doesn’t it gets tossed off the tray to the dog.


 The dough was moderate hydration and left to rise and proof overnight (two nights total):